Drip, Drip, Gone! Conquering the Moen Cartridge Conundrum
Is that incessant drip driving you slowly insane? You're not alone. A leaky faucet is a common household woe, but luckily, it’s usually an easy fix, especially if you have a Moen faucet. Replacing a Moen bathroom faucet cartridge is a manageable DIY project that can save you money on plumbing bills and conserve precious water. This guide will walk you through everything you need to know about tackling this common plumbing problem.
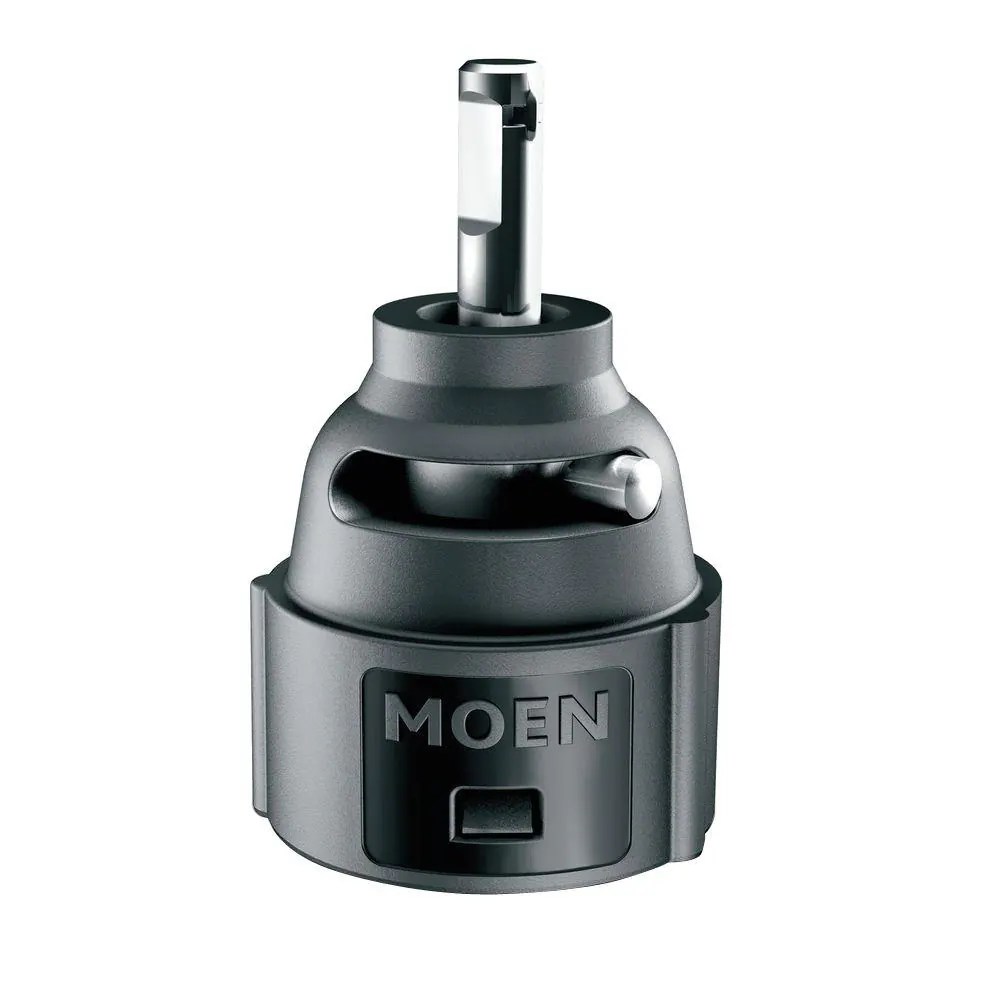
Before we dive in, let's understand the heart of the matter: the cartridge. This ingenious little device controls the flow and temperature of the water in your Moen faucet. Over time, the cartridge can wear out, leading to leaks, drips, and inconsistent water temperature. Hence, the need for a cartridge replacement.
Moen, a well-known and respected plumbing fixture manufacturer, introduced the single-handle faucet cartridge system, revolutionizing how we interact with our faucets. No more fiddling with two separate handles! This innovative design simplified faucet operation and offered more precise temperature control. However, even these durable cartridges eventually require replacement.
Why is replacing a faulty Moen bathroom faucet cartridge so important? Well, beyond the annoying dripping sound that can disrupt your sleep, a leaky faucet wastes a significant amount of water. Even a small drip can add up to gallons of wasted water over time, impacting both your water bill and the environment. Addressing a leaky faucet promptly is a responsible and cost-effective decision.
Replacing the cartridge is often the most effective solution for a dripping Moen faucet. While tightening a loose handle might temporarily stop a leak, it’s often a sign of a deeper issue within the cartridge itself. Ignoring the problem could lead to more extensive damage and costly repairs down the line. So, let’s equip you with the knowledge to conquer this plumbing challenge.
A Moen faucet cartridge is a valve that controls the flow and mixing of hot and cold water. There are different types of Moen cartridges, so identifying the correct replacement for your specific faucet model is crucial. You can usually find the model number on the faucet itself or in the owner's manual. If not, a quick online search using the faucet's description can often help you identify the right cartridge.
Benefits of Replacing a Moen Bathroom Faucet Cartridge:
1. Water Conservation: A new cartridge eliminates leaks, saving water and reducing your water bill.
2. Restored Functionality: Say goodbye to drips, erratic water temperature, and difficulty controlling water flow. A new cartridge restores your faucet to optimal performance.
3. Cost Savings: Replacing the cartridge yourself is a much cheaper option than hiring a plumber.
Step-by-Step Guide to Replacing a Moen Bathroom Faucet Cartridge:
1. Turn off the water supply to the faucet.
2. Remove the handle. This usually involves removing a screw or cap and pulling the handle off.
3. Remove the retaining clip that holds the cartridge in place.
4. Pull out the old cartridge.
5. Install the new cartridge, ensuring it’s properly aligned.
6. Reinstall the retaining clip, handle, and any other removed components.
7. Turn the water supply back on and test the faucet.
Advantages and Disadvantages of Replacing a Moen Bathroom Faucet Cartridge
| Advantages | Disadvantages |
|---|---|
| Cost-effective DIY repair | Requires some basic plumbing knowledge |
| Saves water and reduces water bills | Can be challenging to identify the correct replacement cartridge |
| Restores faucet functionality | May require special tools |
FAQ:
1. How often should I replace my Moen faucet cartridge? Typically, every 5-10 years, or when you notice leaks or performance issues.
2. Where can I buy a replacement cartridge? Hardware stores, plumbing supply stores, and online retailers.
Tips and Tricks:
Take pictures throughout the process to help you remember how everything goes back together.
In conclusion, replacing a Moen bathroom faucet cartridge is a straightforward and rewarding DIY project. It not only addresses annoying drips and restores proper faucet function but also contributes to water conservation and helps you avoid costly plumbing bills. By following this guide, you can confidently tackle this common plumbing issue and enjoy a smoothly operating, leak-free faucet for years to come. Don't let that drip continue to drain your wallet and the planet – take action today and experience the satisfaction of a successful DIY repair!
Escape the texas heat best summer havens
Unlocking number magic skip counting adventures for first graders
Spider and rose tattoos a thorny symbolism


